Folding Text Effect Tutorial
This tutorial will help for the general and advance user's who will design with folding text effects with the help of Adobe Illustrator CS 10
Step 01
First, create a 700by300px document. Start with the
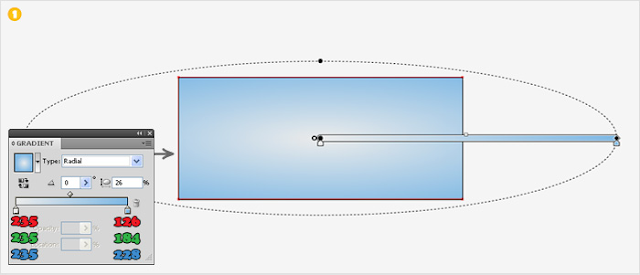
background. Select the Rectangle Tool(M), create a 700x300px shape and fill it
with the radial gradient shown in the image below. Lock this shape.
Step 02

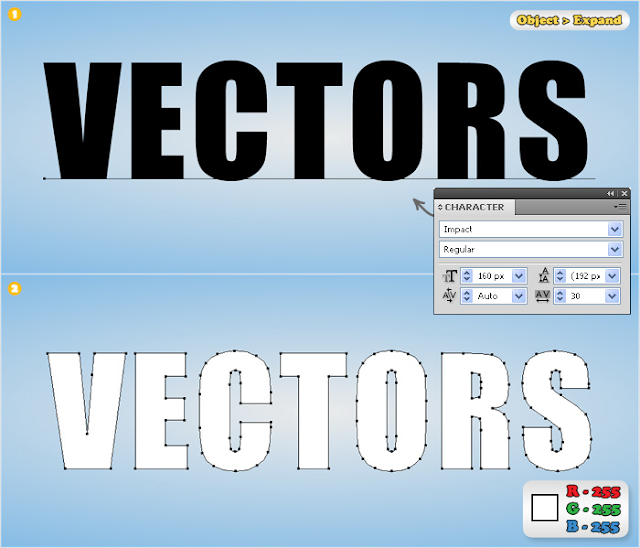
Select the Type Tool(T) and add your text. Use the Impact
font then follow all the other properties shown in the Character pallete (image
#1). Select this new text and go to Object > Expand. Fill the resulting
shapes with white and place them in the middle of your art board.
Step 03
Step 03
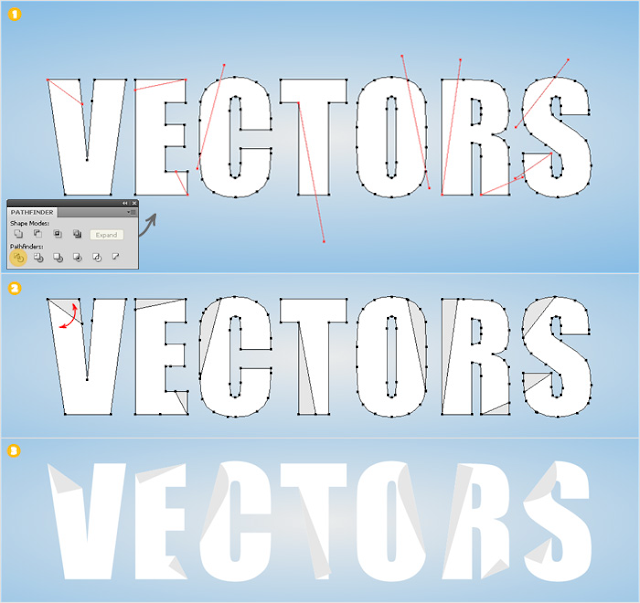
Next, you need to cut some small shapes from these letters.
Pick the Pen Tool(P) and create some paths like image #1. Select them along
with the letters then click on the Divide button from the Pathfinder pallet
Create a new layer, name it “LETTER SHAPES” and move the shapes filled with
white (from image #2) inside. Create another layer, name it “FOLDED SHAPES” and
move the shapes filled with gray inside. Use the Reflect Tool(O) to move all
the folded shapes as shown in image #3.
Step 04
Step 04
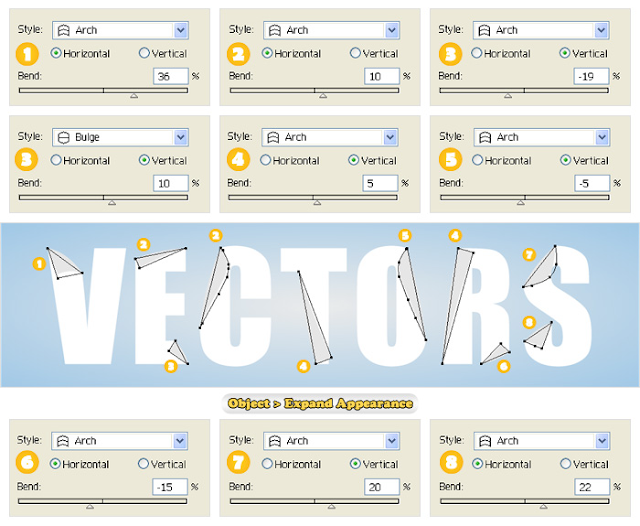
Add these Warp effects for each shape from the “FOLDED
SHAPES” layer then go to Object > Expand Appearance.
Step 05
Step 05
Step 06
Duplicate the “FOLDED SHAPES” layer then add these Drop
Shadow effects for each shape from the duplicate of “FOLDED SHAPES”.
Step 07
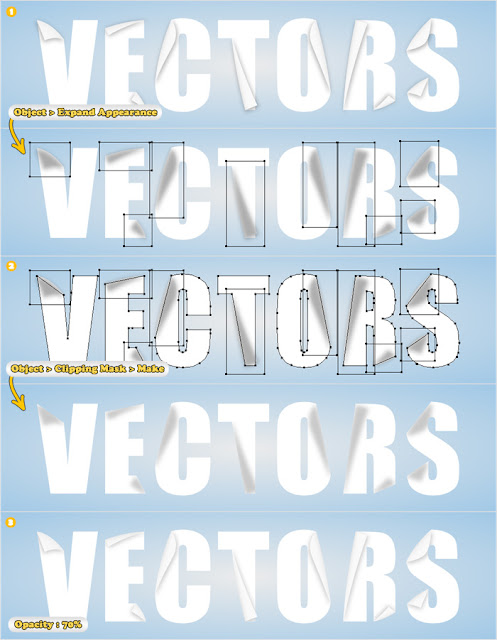
Select the shapes from the duplicate of “FOLDED SHAPES” then
go to Object > Expand Appearance. Delete all the shapes from the resulting
group, except the “< Image >” shapes. Select them all and group them
(Ctrl + G) as shown in image #2. Duplicate the “LETTER SHAPES” layer. Select
this new layer and go to Composed Path > Make. Name the resulting shape
“Letters” and move it above the < Image > group. Next, select “Letters”
along with the group the go to Object > Clipping Mask > Make. Name the
resulting group “SHADOWS” and move it between “LETTER SHAPES” and “FOLDED
SHAPES”. Later you can lower the opacity of this group 70% or any percentage
you want.

Step 08
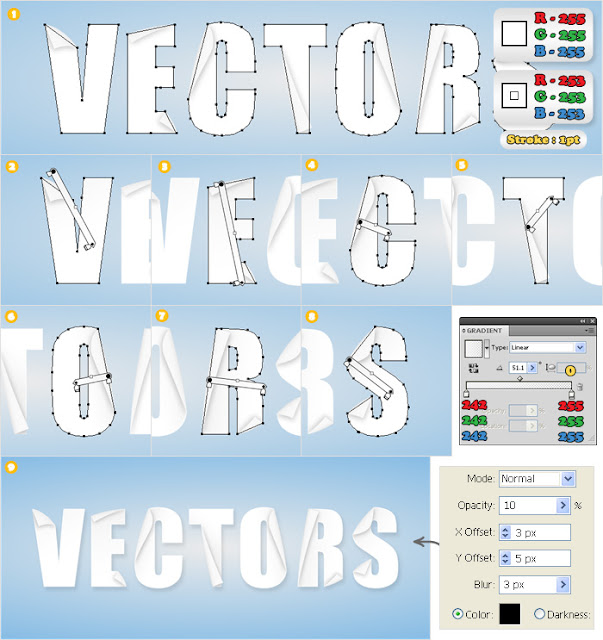
Let’s continue with the letter shapes. Make sure that all
these shape are filled with white then add a 1pt aligned to inside stroke
(R=253 G=253 B=253). Next, add a new fill for each of these shapes then use the
liner gradients shown below image #5. Finally add the drop shadow effect shown
next to image #9.

Step 09
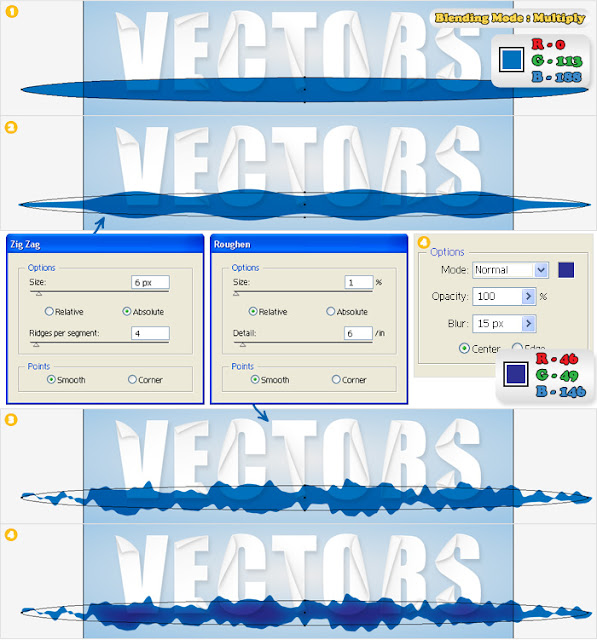
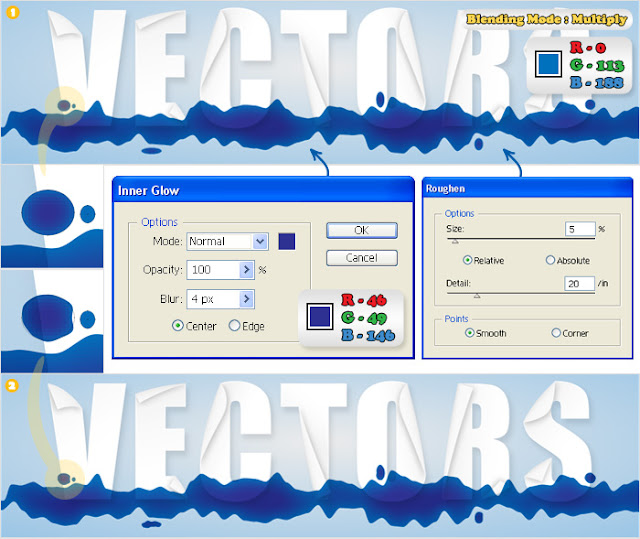
Select the Ellipse Tool(L) and create a squeezed shapes like
the one shown in image #1. Fill it with R=0 G=113 B=188, change it’s blending
mode to Multiply then add the Zig Zag, the Roughen and the Inner Glow effects
shown in the next images.

Step 10
Re select the Ellipse Tool(L) and create some random ellipses
like in image #1. Fill them all with R=0 G=113 B=188, change the blending mode
to Multiply, add the Inner Glow then group all these shapes (Ctrl + G). Select
this group and add the Roughen effect shown in the next picture.

Step 11
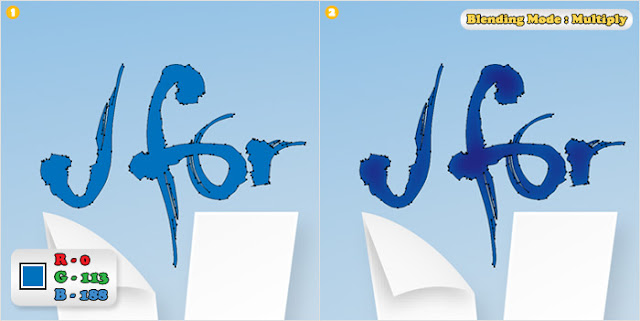
Finally, open the Brushes pallet. Click on the drop down
menu of this pallet and go to Open Brush Library > Artistic >
Artistic_Ink. Select the Brush Tool(B) then use the “Fountain Pen” brush to
create your text. Select these new paths then go to Object > Expand
Appearance. Next, select the resulting shapes and click on the Unite button
from the Pathfinder pallet Fill the resulting shapes with R=0 G=113 B=188, change
the blending mode to Multiply then add an Inner Glow like the one used in the
previous step.

Final
Now your text effect is done. Here is how it should look
like.



Comments
Post a Comment