3 - D Flower Pot
Step 1
Make sure you have no fill color. Choose a color for your
stroke color. The color you choose for the stroke color will become the color
for your flower pot. I chose a gray color. Using the Pen Tool, we’re going to
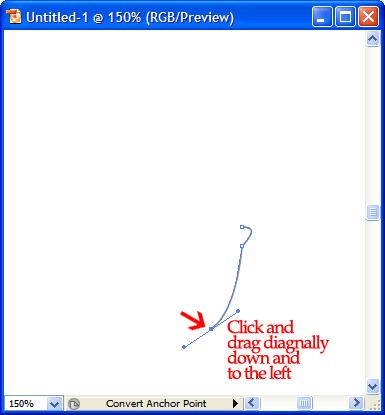
draw the right side of the flower pot. Let’s begin with drawing the top part:
We need to convert the second point to an anchor. This is
easily done just by clicking the point again. You’ll notice that the handle
that was pointing diagonally downward is now gone:
Step 2
Let’s continue by drawing the middle part of the flower pot:
Again, we need to convert this point to an anchor. This is
easily done just by clicking the point again. You’ll notice that the handle
that was pointing diagonally downward is now gone:
Step 3
Now let’s finish by drawing the bottom part of the flower
pot:
Step 4
Now that we have the right side of the flower pot drawn out,
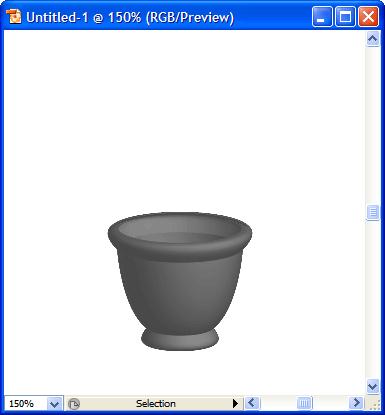
we can use the 3D Revolve effect to create the 3D flower pot! With the path
selected, go to Effect > 3D > Revolve and use the following settings:
That should leave you with the following result:
Step 5
Let’s add some more details like soil and maybe a flower!
Again, using the Pen Tool and the methods you just learned with the previous
steps, draw the following shape and give a brown fill with no stroke:
We’ll add some texture to give a more realistic look. With
the shape still selected, go to Effect > Texture > Texturizer and use the
following settings:
That should leave you with the following result:
Step 6
To finish it off, let’s add some flowers! You could draw
your own, but to make it easier, there are some nice flowers already made and
available within Illustrator. Open your Symbols palette by going to Window >
Symbols and look for Flowers in the Symbols Library.
Conclusion
Drag the flower into your design and position to your
liking. You will also have to do some editing to get the flower to appear like
it’s in the pot. Here’s my final result:
.jpg)


.jpg)


Comments
Post a Comment