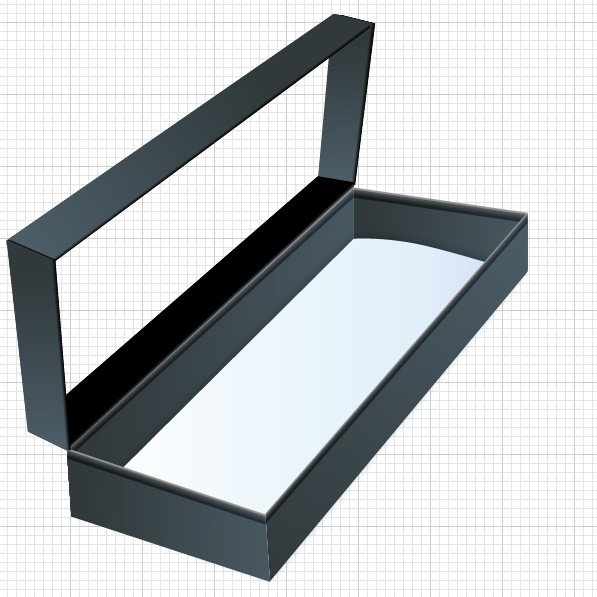
Create a Pen
Step 1
.jpg)

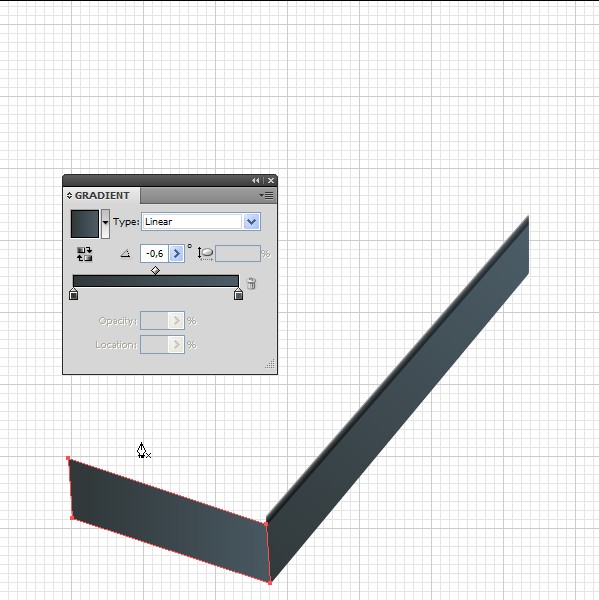


Open a new document and grab the
Pen Tool (P). Create a rectangle shape as shown below, and then fill it with a
Linear Gradient. To do this, open the Gradient panel (Command + F9), select
Type: Linear. For the first Stop Color Slider apply color R=49, G=57, and B=59.
For the second one R=76, G=93, and B=103.


Step 2
Copy the shape you just created using Command + C followed
by Command + B under it. Move the copy a few pixels upwards and change the Fill
color to: R=153, G=153, and B=153.
.jpg)
Step 3
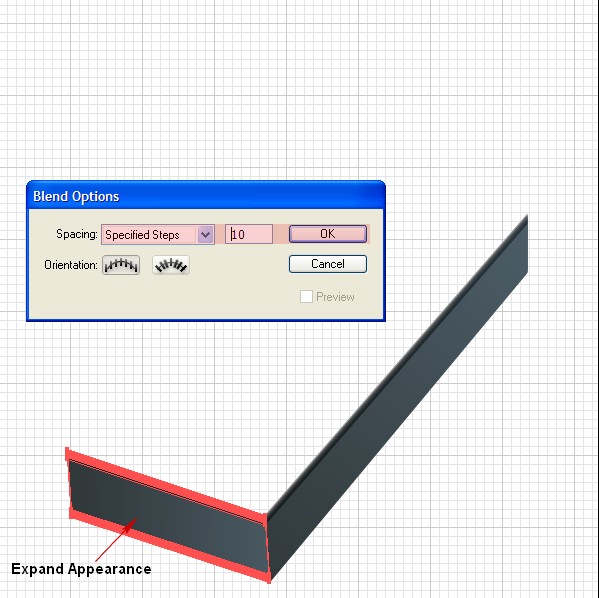
Now select the two shapes and go to Object > Blend >
Blend Options. Now in the opening window, set Spacing to Specified, Steps to
10, and click OK. Then go to Object > Blend > Make and straight after
that go to Object > Expand Appearance.

Step 4
Apply the same actions to the left half of the box. Fill it
with the same Linear Gradient used in Step 1.

Step 5
Copy the last created shape using Command + C followed by
Command + B, and move it a few pixels upwards using the arrow keys. Now change
the Fill color to gray (R=153, G=153, and B=153). Select the two shapes and go
to Object > Blend > Blend Options. In the newly opened window set Spacing
to Specified Steps at 10, then click OK. Now go to Object > Blend > Make
and straight after that apply Object > Expand Appearance.

Step 6
Repeat the same actions for the top and right side of the
box.

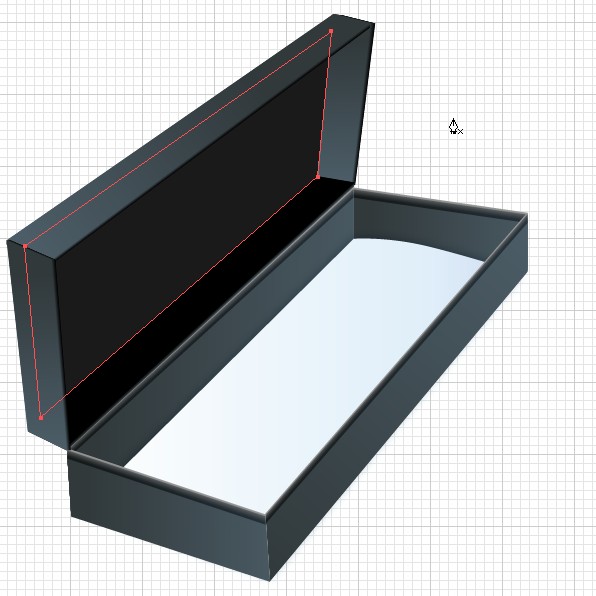
Step 7
Now pick the Pen Tool (P) and create a shape like the one
shown below. This will be the box’s bottom.

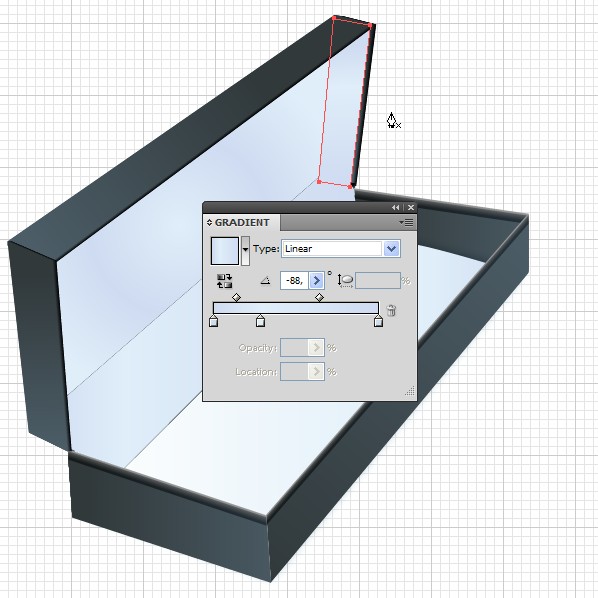
Step 8
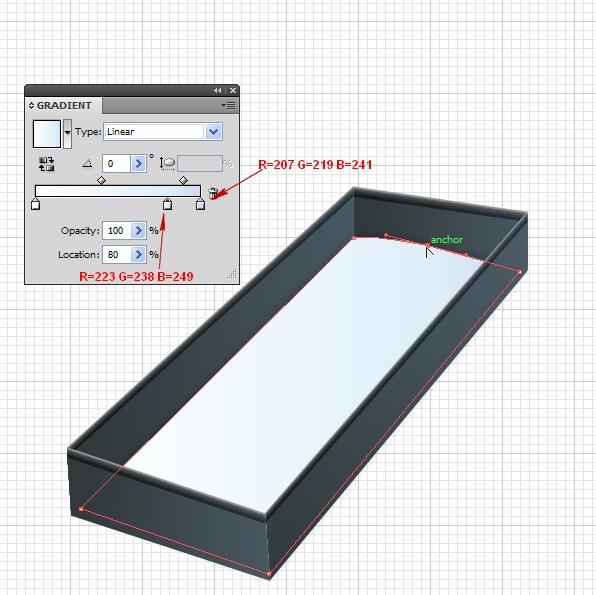
Copy the shape, which will be the bottom using Command + C
followed by Command + F. Pick the Add Anchor Point Tool (+), add one point in
the top part of the copy, edit the key point as shown below, and fill with a
Linear Gradient. To do this, open the Gradient panel (Command + F9), select the
Type of Linear. You need three Stop color Sliders all together. From left to
right select a white color, for the second one R=223, G=238, B=249 and for the
third one R=207, G=219, and B=241.

Step 9
With the last created shape that we filled with a Linear
Gradient is still selected, go to Effect > Stylize > Drop Shadow. Apply
the following settings: Mode of Multiply, Opacity at 75%, X Offset at 0, Y
Offset at 0, Blur at 5px, and color of #718189.

Step 10
Pick the Pen Tool (P), create a rectangle shape in the
position shown, and fill with a black color.

Step 11
Copy the last created shape using Command + C followed by
Command + B under it. Change the Fill color to gray and move the copy a few
pixels downwards.

Step 12
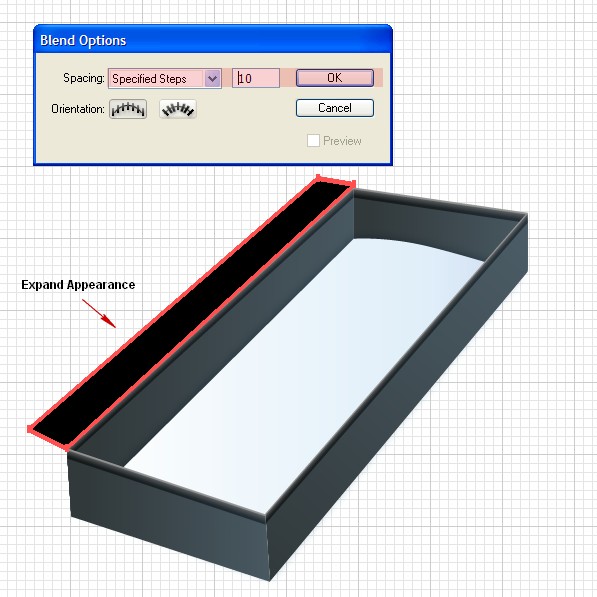
Now select the last two shapes and go to Object > Blend
> Blend Options. Then in the open window set Spacing to Specified Steps at
10, and click OK. Now go to Object > Blend > Make (Alt + Command + B) and
straight after that apply Object > Expand Appearance.

Step 13
Create the remaining sides and the box lid using the same
process.

Step 14
Now using the Pen Tool (P), create a shape behind all the
other shapes of the lid, then fill with a dark gray color.

Step 15
Copy the last shape of the lid using Command + C followed by
Command + F and fill with a Radial Gradient.

Step 16
Let’s keep working with the Pen Tool (P). Create a shape in
the position shown below and fill with a Linear Gradient.

Step 17
Create a shape over the right side of the lid and fill with
a Linear Gradient as shown.

Step 18
Again, use the Pen Tool (P) to create a shape in position
shown. Fill it with a black color and go to Effect > Blur > Gaussian
Blur. Now in the new window apply a Radius of 20px, then click OK. Also, reduce
the Opacity to 25%.

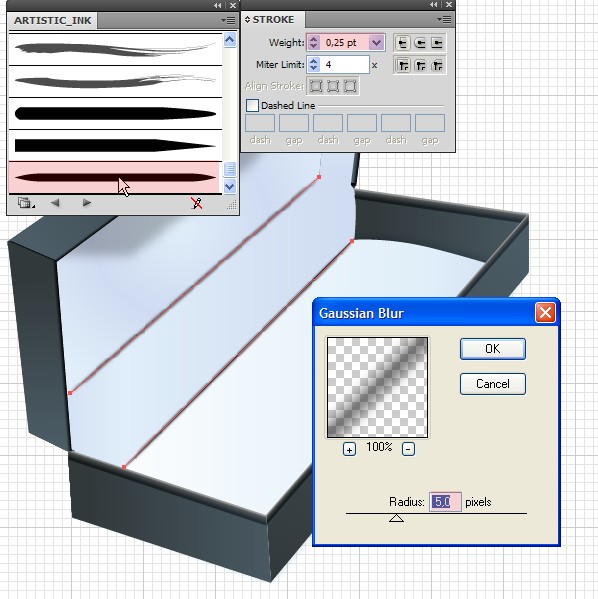
Step 19
Create two lines using the Pen Tool (P) and apply a Stroke
color of black. Now go to Window > Brush Libraries > Artistic >
Artistic Ink. Select “Tapered Stroke” and decrease the Stroke color to 0,25pt.
With the two lines still selected, go to Effect > Blur > Gaussian Blur,
then set the Radius to 5px, and click OK.

Step 20
Create a line in the top part of the lid with Stroke color
set to white and weight at 0,10pt, then apply a Gaussian Blur of 3-4px.

Step 21
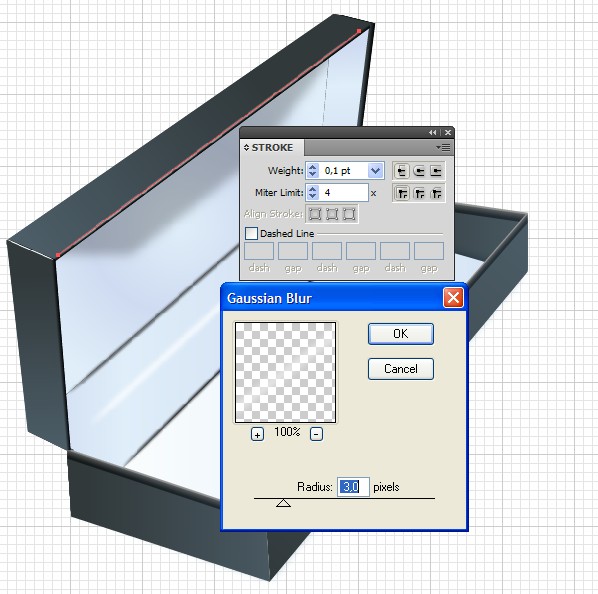
We continue by adding shadows and reflections. Create a line
in the position shown below. Go to Window > Brush Libraries > Artistic
> Artistic Ink, select “Tapered Stroke.” Now give it a Weight of 0,50%, set
the color to white and apply a Gaussian Blur with a Radius of 10px.

Step 22
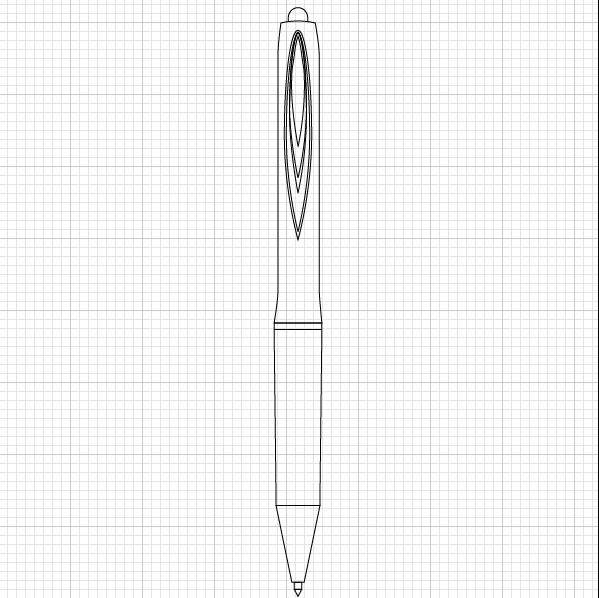
We are ready with the box. Now it’s the pen’s turn. Grab the
Rectangle Tool and create the shapes of the pen as shown below.
Note: You can pull points with the Direct Selection Tool
where needed to curve various corners. You may also need to convert points to
Smooth in the top menu bar, after selecting them with the Direct Selection
Tool. You may also prefer to use the Pen Tool in places or other shape tools.

Step 23
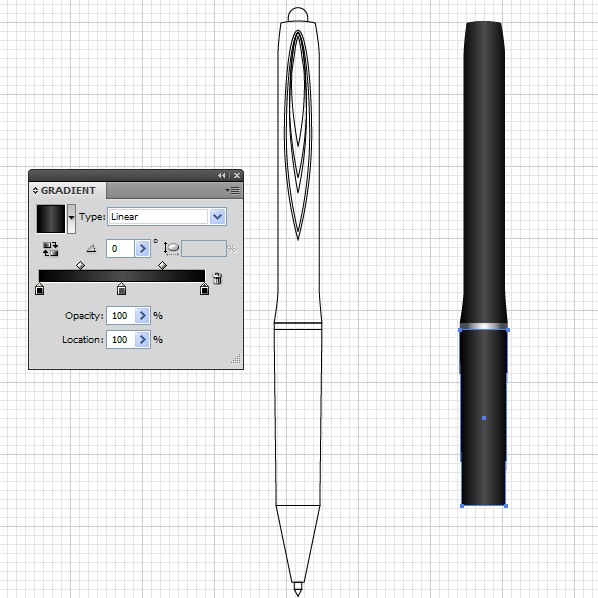
Now we need to fill the shapes with color. Let’s start with
the top part of the pen and then work our way down, adding gradients. Have a
look at the images below for reference here.


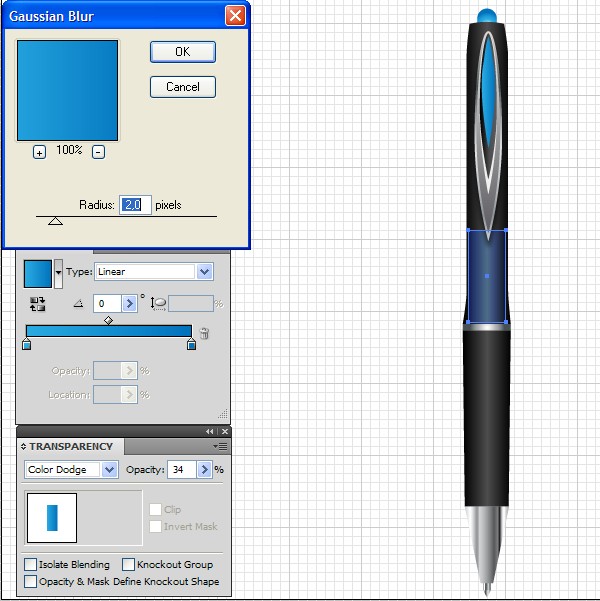
Step 24
Create a rectangle over the top part of the pen. Now fill it
with a Linear Gradient with colors that go from blue to dark blue. Change the
Blend Mode from Normal to Color Dodge, apply Gaussian Blur with a Radius of
2px, and reduce the Opacity to 35%.

Step 25
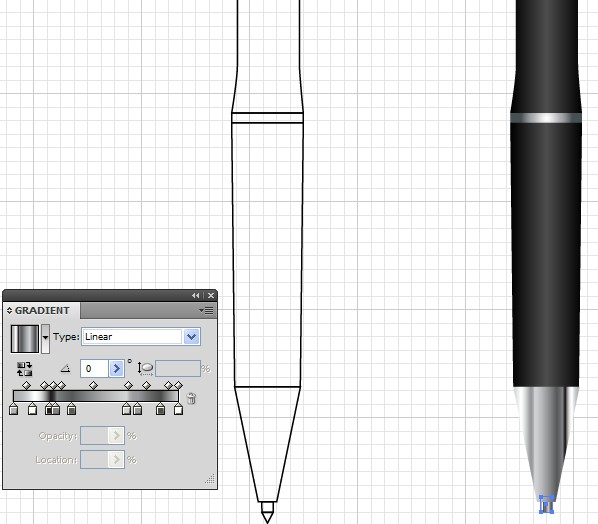
Create two lines with a Stroke color of white and Weight set
to 1pt. In the top part of the pen apply a Gaussian Blur with a Radius of
9-10px, then reduce the Opacity to 50%.

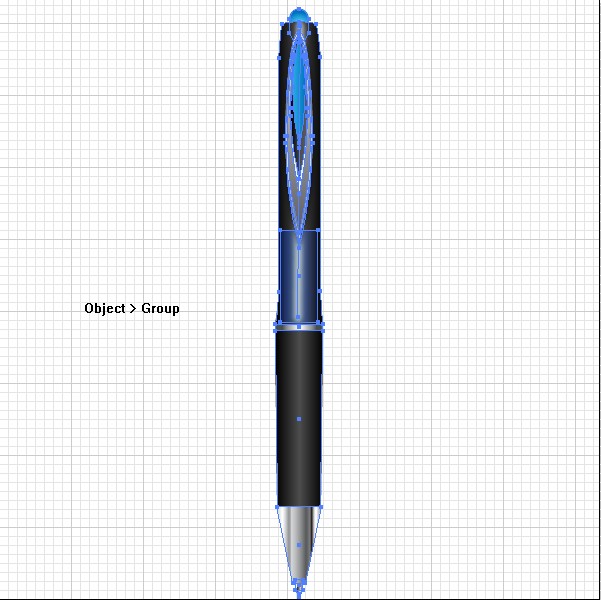
Step 26
Now group all the shapes of the pen by selecting them and
apply Object > Group.

Step 27
Now if you want, you can put the pen in the box. To do this,
select all shapes of the pen and go to Object > Transform > Scale. In the
new window set Scale to 55%, and click OK. This way you’ll decrease the pen’s
size.

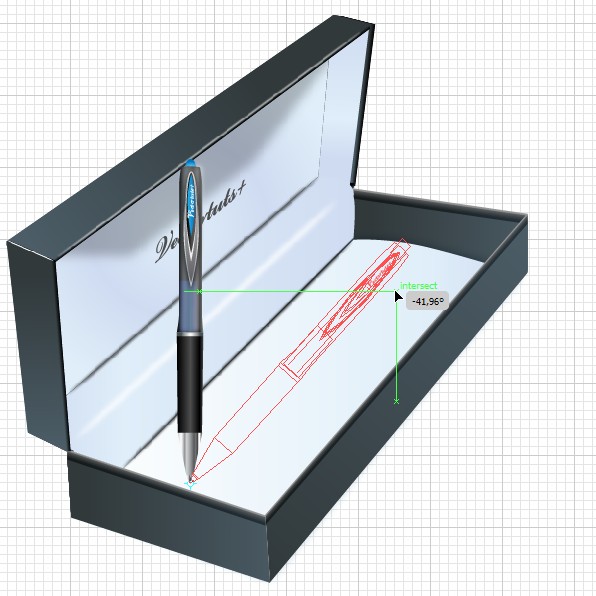
Step 28
Now put the pen over all shapes of the box and in position
as shown.

Step 29
Pick the Rotate Tool (R), click on the very lowest point of
the pen and rotate until you make sure it’s in the correct position.

Step 30
Create a rectangle shape using the Pen Tool (P). Now move in
under the shapes of the pen and fill with black.

Step 31
Copy the shape you created earlier using Command + C
followed by Command +B. Now send it under all shapes of the pen, apply Gaussian
Blur at 10px, and decrease the Opacity to 50%.

Conclusion
In the end you can add shadow on the box and a background –
anything you wish.


Comments
Post a Comment